Tag: backflow testing

Drain Cleaning – How to Get Rid of Clogged Drains

Drain Cleaning Philadelphia isn’t often at the top of homeowners’ to-do lists, but when slow-draining sinks, it’s time to call in the professionals. Read on to learn about the best products and methods for clog removal.
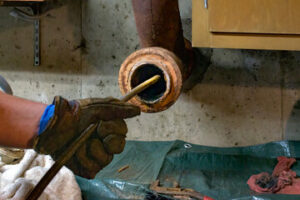
Drain Cleaning

Many clogged drains are caused by fat, oil and grease (FOG) that builds up inside pipes. Pouring a mixture of baking soda and vinegar down the drain can dislodge this build-up and move it down the pipes. Just be sure to follow it up with hot water to avoid damaging your plumbing pipes.

Hair, coffee grounds and food scraps can also cause clogged pipes. It’s important to put these items in the garbage instead of the drain. Likewise, children’s toys and other objects often end up in toilets or showers. If these items aren’t properly disposed of, they can cause large blockages that require professional help to resolve.

Chemical drain cleaners are available at most hardware and grocery stores. These products are easy to use- just pour, wait and flush. However, some are corrosive to plastic pipes and may not be safe for all drains.

Another option is to try one of the newer “air burst” drain cleaning devices. These are designed to release a blast of air into the pipe, which can break up small clogs. However, these items don’t always work and are not recommended for regular use. If these solutions don’t work, call a plumber for professional help. A professional plumber will use a high-pressure drain blaster to clean out your clogged pipes without damaging them. They can also suggest ways to prevent future clogs.

Clogged Sinks

Sink drains often clog with hair, food scraps, soap scum, or oily residues that stick to pipe walls over time. Clogged drains can cause foul odors that spread through your home, so it’s important to address them as soon as you notice slow-moving or standing water.

One of the best ways to clean a clogged sink is by using an inexpensive plastic drain cleaning tool. These 24-inch to 36-inch strips have barbs cut into them that grab ahold of clogs and pull them straight out of the drain. Just insert the device into the drain, scour over any hair or other debris, and then pull it back out. It’s important to pull it out straight up and not to twist or turn it sideways, which can break the tool or even worsen the clog.

Another simple way to unclog a sink is by using a combination of baking soda and vinegar. This natural kitchen staple reacts to eat away at organic material that clings to the pipes in your sink. Simply pour one cup of baking soda followed by one cup of vinegar into your clogged drain, plug it, and let the mixture sit for about an hour. Then, flush it with boiling water.

For serious clogs, a plumbing snake may be needed to remove the clog from your pipe system. This heavy-duty tool is powered by a motor that rotates a blade fastened to the end of a cable. Feed the snake into the affected drain and then advance it until you feel it hook a clog.

Clogged Toilets

A clogged toilet can be a big inconvenience. Not only is it inconvenient for the household, but the overflowing waste can create health hazards and property damage. If a plunger does not clear the clog, it may be time to call for professional drain cleaning services.

Non-flushable items are a major reason behind constant toilet clogs in many households. Products that claim to be flushable, such as “flushable wipes,” actually cause problems for home plumbing systems and sewage systems. Cotton balls, q-tips, and paper towels are other common culprits that should not be flushed, either. Instead, place a trashcan in every bathroom so that these items can be properly disposed of.

Another common reason for a clogged toilet is an overflowing or sewage-backed-up bowl. This is usually a sign of an issue in the toilet’s trap or a larger blockage in the branch drain line or main sewer line.

If plunging does not resolve the clog, try using a long metal stick called a drain snake (or auger). This is an effective tool for breaking up and dislodging stubborn debris. If you don’t have a drain snake, you can try using an empty plastic bottle — preferably one that has a narrow opening, such as a two-liter soda bottle — filled with water. The bottle will add weight to the stick and help it break up a clog.

Clogged Showers

Showers are another place where hair and soap scum can build up, leading to a clogged drain. If your shower has a lot of gunky, smelly buildup and you have a hard time getting water to flow down the drain, try pouring boiling water down it. Make sure you do this carefully so you don’t damage the pipes or your skin.

If the hot water doesn’t work, try a DIY cleaning solution made of baking soda and vinegar. Pour a cup of the solution into your shower drain and leave it to sit for an hour. After the hour is up, pour more hot water down the drain to rinse away the cleaning solution and any lingering debris that might be in your shower drain.

Using chemical drain cleaners is a last resort. These caustic chemicals can be damaging to your pipes and shower fixtures, as well as a health risk for you and your family. If you must use them, make sure you follow the instructions very closely and don’t let the solution sit for longer than recommended.

Other ways to prevent clogged shower drains are to clean your bathroom with safe household cleaners, comb or brush your hair before showering and transfer any loose hair to a wastebasket. In addition, try a plunger on your clogged shower drain, but be sure to line the plunger with petroleum jelly for a better seal and more suction power.

Clogged Bathtubs

The bathtub drain sees the most use in our homes, and it is often the site of hair-related clogs. Hair clumps and soap scum build up over time to stop water flow and create foul odors.

If you are lucky, a simple mix of baking soda and vinegar will clear your tub drain. Pour half a cup of baking soda into the drain, followed by about a cup of white vinegar. Let the mixture fizz for about 15 minutes before running water into the drain to see if it worked. Repeat this process if necessary.

Alternatively, try a chemical drain cleaner. However, we advise against using acidic drain cleaners that contain nitrates or peroxides, as they can be harmful to pipes and your skin. If you do choose to use a chemical drain cleaner, make sure that it is safe for your pipes and follow the instructions carefully.

If you are unable to unclog your drain by using the tips above, or if you notice that your clogged tub drain is emitting foul odors, call in a professional plumber. They will have more tools and experience to get your drain flowing again. They will also be able to recommend ways to prevent future clogs. In addition, they will be able to inspect your home’s plumbing and make any necessary repairs.

Clogged Drains in the Basement

Floor drains in the basement are more prone to clogging than other drains because they’re located in the floor of the house where dirt and debris often collect. Debris in the form of dust bunnies, hair, and other organic matter can find its way into a basement floor drain and cause it to clog.

The good news is that a basement floor drain doesn’t necessarily have to be as difficult to clean as other drains in the home. You can use a combination of baking soda and vinegar to break up the clog in most cases. First, remove the drain cover and clean it off with hot water. Remove any dirt or debris that you can reach with your hands and place it in a garbage pail.

Pour a mix of 1/2 cup of baking soda and 1 cup of distilled white vinegar down the drain. Wait about 30 minutes to allow the mixture to foam and cling to the clog. Next, remove the stopper and plunger vigorously. You may have to repeat this several times before you can get the clog loose.

If the above cleaning methods don’t work, you may need to use a snake to unclog your basement drain. You should always consult with a professional before using a snake because some products like Drano can damage the glue holding your pipes together, creating more problems in the future.
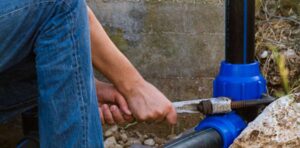
Drain Repair Is a Tricky Thing to Do Because Most of the Plumbing Lines Are Buried Underground

Drain Repair Near Me is a tricky thing to do because most of the plumbing lines are buried underground. The traditional method involves excavation which disturbs the surrounding environment.

Drain Repair

One of the first steps in drain repair is to diagnose what needs to be fixed. Many plumbers use a variety of tools to find out what is wrong with the pipe.

Drain pipes are hardly ever thought about until they’re having trouble, but once that happens, the need for professional drain repair is immediately apparent. Many do-it-yourself remedies can produce paltry results at best and damage the pipes at worst, so it’s always a good idea to call in an experienced plumber right away.

The first step in any drain repair is unclogging the clogged pipe. This can be done with a few simple tools and supplies that are typically around the house, depending on which drain is clogged. For kitchen sink drains, a quick pour of boiling water can dislodge problem-causing buildup and get the pipes flowing again.

For toilets and other drains in the home, a plunger is a great tool for breaking up and pushing apart clogs. Just plunge up and down several times to create a suction effect that breaks up and dislodges the clog. After using the plunger, run hot water down the drain to flush out any remaining gunk.

Another great way to unclog a drain is with a wire drain snake. These devices are available at most hardware stores and work by chopping up and pushing through clogs with a coiled metal wire that has a broader gap at one end. To use a snake, remove the pop-up assembly in the drain and insert the metal cable down the pipe. Turn the handle on the snake to crank it down the drain while feeding a few feet of wire at a time until you feel resistance or the clog is gone.

For more serious clogs, or for drains that seem to be in need of an overhaul, professional plumbers may have to employ some high-end equipment. They might start by unclogging the clog using various methods, including powered drain augers and high-pressure water jets. Then they might try a more in-depth drain cleaning or even replace the entire pipe if needed.

Pipe Patching

A leaking drain pipe may not seem like a big deal at first, but it can lead to significant property damage, malodor and the contamination of soil or groundwater. As a result, it is imperative that you have any leaks repaired as soon as possible. Fortunately, you can usually do this without calling a plumber by using an epoxy or tape to seal the leak until a plumber can make a permanent fix.

The first step is to find the source of the leak. This can be done by running water through the drain and checking for signs of leaking. If you can locate the location of the leak, the next step is to remove any dirt, mud or debris covering the area. This will prepare the area for the patching.

To patch a drain, use epoxy putty designed for PVC or other plastic pipes. Follow the manufacturer’s instructions for preparation and application of the epoxy. Most types of epoxy set quickly and will be ready for use in about 25 minutes, but you can let it sit longer to achieve full strength.

After the epoxy has set, run water through the drain and check for a permanent fix. If the repair is faulty, you can replace it with a new pipe or fitting. You can also use rubber patches for this purpose, but they should be regarded as stop-gap measures. They should only be used in places where the damage is not too serious and the repairs can be made quickly.

If you can’t afford to wait for a plumber, you can temporarily patch a leak with fiberglass-resin tape. This can be purchased at most hardware stores and is simple to use. Wear gloves while working with the tape, as it will heat up while it’s setting. Once the tape is on, turn off the water and let it set for as long as directed by the manufacturer.

Pipe patching is an effective alternative to excavation and is suitable for a wide range of pipe types. It’s especially useful for drains located under driveways and homes, where traditional digging can cause significant damage to the foundations of a home or other structures.

Trenchless Pipe Repair

Old aging pipes often need to be repaired or replaced because of cracking, leaks, broken joints, age deterioration and other issues. Traditional sewer pipe replacement is a disruptive and expensive process that requires your plumber to dig large trenches throughout your property to expose and access your pipes for repair or installation.

Trenchless Pipe Repair is an alternative that uses no digging to repair or replace your aging pipes. Pipe lining, slip lining, shotcrete, gunite, and cured in place pipe (CIPP) are a few of the popular methods used to perform trenchless pipe repair.

This process consists of inserting a flexible, epoxy-saturated liner into your existing sewer lines. The liner is pushed through your damaged pipes by a specialized winch tool, where it expands to fill the entire pipe interior. This creates a new structural pipe within your old one, fixing problems like leaks, holes, channeling, and root intrusion. The new pipes can also be larger in diameter than your original ones, increasing flow capacity and efficiency.

Preserves Landscaping

Many homes and businesses have their pipes running underneath valuable landscaping that can be destroyed by digging up a yard to access and repair them. Trenchless pipe repair only needs a few small access holes at the entrance and exit of your pipes, which greatly reduces the damage caused to the surrounding environment.

Economical

Using trenchless pipe repair can save you time and money in the long run. Pipe liners require far less maintenance and will last significantly longer than your original pipes, meaning you won’t need to spend as much money on repairs in the future. In addition, the piping can be made out of higher quality materials that will help your pipes function more efficiently and effectively, making them last even longer.

No matter what caused your damaged sewer lines, it is important to talk to a plumber about the options for trenchless repair. Your local plumber can inspect your lines and recommend the best solution. Then you can rest assured that your plumbing will be safe and effective for years to come.

Drain Lining

As a homeowner, the last thing you want to worry about are damaged drain pipes. They not only pose a significant threat to the safety of your family, but they can also damage property by polluting the surrounding environment. In the past, the only way to fix leaks and cracks in drainage pipes was to dig them up and replace them, which is a time-consuming and costly process. Fortunately, modern technology has made it possible to repair damaged drains without the need for digging.

One method is called drain lining and works by inserting an extra pipe inside the existing one. The pipe is made from a strong polymer that will bond with the existing one to create a single, seamless, watertight pipe. This is a less invasive method than traditional excavation and can save you money in the long run by reducing your plumbing bills.

Before the lining process begins, technicians will use jet-washing to clean the pipes and remove any clogs or debris. Then, they will use a camera inspection to assess the extent of the damage and determine the type of lining needed for the job. Once they know what kind of lining to use, they’ll start the repair.

During the lining process, experts will saturate a felt liner with an epoxy resin. Once it’s fully saturated, they will score the outside of the liner to allow it to fit into the pipe. Once the liner is in place, an air bag will be inflated to force it into place and adhere to the walls of the preexisting pipe.

The lining process takes only a few hours, and it’s a much safer alternative to traditional excavation and replacement. However, it’s important to limit your water use during this process. It’s best to turn off sump pumps and only flush water or other liquids sparingly during this period. It’s also a good idea to avoid putting solid items down the drains, such as toys or kitchen waste.

Drain relining is a relatively new technique that allows homeowners to repair broken drainage pipes without the need for excavation. It can be used to fix leaking joints, open or cracked pipes, and even radial or circumferential cracks caused by blockages. It’s also very effective in combating root intrusion, which is common with old clay drains.

Sump Pump Repair Basics

Professional sump pump repair can cost a bit more than DIY work, but the price is worth it for accurate diagnosis and skillful repairs. They’ll also be able to ensure that your warranty stays valid.

Sump Pump

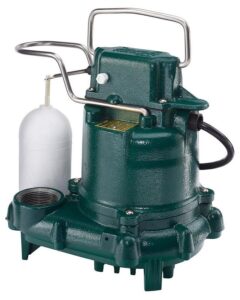
A clogged or broken sump pump will lead to flooding and expensive repair bills. If you spot these problems, it’s important to have them repaired immediately. Contact Plumber St. Petersburg FL for professional help.

The float switch within your sump pump helps to keep it running at the correct water level. It does this by moving up and down with the amount of water in the pit, activating when it reaches your pumps designated pumping point, then shutting off when it falls below. When your float switch fails, the pump will not activate when it needs to, and this can lead to flooding and other problems.

There are a few different reasons that your float switch might fail, the most common being that it gets stuck. This can be caused by debris in the basin, or it may be because the float itself is blocked. It is important to regularly open the sump pit lid and sweep it out to prevent this from happening.

Another reason that your float switch might fail is that it is not working properly. This can be because the float arm is not rising and falling with the amount of liquid in the pit, or because the pump is not activating correctly. It is important to test this by pouring water into the pit, then watching the float arm to see whether it rises and falls as it should. If it does not, it is likely that the switch is faulty and it will need to be replaced.

Float switches can be purchased in many different sizes, styles, and voltages, so it is important to choose one that is compatible with your pump. Look for a piggyback style float switch that will plug into the back connector of your pump. This will ensure that the new switch is not shorting out the electrical circuit, which can be a serious safety issue. Also, make sure that the new switch has a cord that is long enough so that you can easily reach it to turn the pump on and off when needed.

Once you have a new float switch, you will need to loosely attach it to the pump housing with a zip tie, and then plug the bypassed electrical wire into it. Fill the pump basin with water, and then adjust the attachment point for the new switch so that it will activate when the pit is at the right water level.

Motor

A sump pump motor is a crucial part of your home’s drainage system. It’s essential to check its operation regularly and ensure that it is in good working order. A simple way to test your sump pump is to pour water into the pit and watch how it reacts. If the float reaches its limit or the motor begins to overheat, it’s time to call a plumber for a repair. A professional can recommend a long-term solution to prevent future flooding.

Sump pumps are often installed in the lowest point of your home, which is usually the basement. However, they can also be located in a cellar or crawl space. In either case, it’s important to keep in mind that the sump pump is constantly exposed to water, which can cause corrosion and other issues.

One common problem with a sump pump is that the motor is too small for the volume of water it must move. A smaller pump will constantly struggle to keep up, leading to a short lifespan for the motor and potentially flooding your basement. To avoid this issue, have a plumber assess the size of your sump pump and install a larger one.

Sump pump repairs can cost a lot of money depending on the type and extent of the damage. Fortunately, there are many factors that can reduce the cost of the job. Regional prices, labor rates, and insurance requirements all affect the final price. You can also save on plumbing costs by getting a home service warranty, which covers labor and parts for the duration of the plan.

A professional plumber will be able to diagnose the exact problem quickly and provide a repair estimate before work begins. They will also be able to recommend the best possible upgrade or replacement for your sump pump if it’s beyond repair. They will take into account your budget and personal preferences when recommending a new installation. The plumber will also help you choose the right type of pump for your home and take care to protect your property during the installation process.

Discharge pipe

The sump pump’s discharge pipe is an essential part of the system. It allows the water from the pit to be pumped away, which is vital because it can help prevent flood damage to the basement and other areas of the home. The discharge pipe should be inspected regularly to make sure it is functioning properly. It may be clogged or blocked, and it may need to be replaced.

A common problem with the discharge pipe is that it gets buried in dirt and debris. If this happens, it can block the pipe completely and cause it to stop working. In addition, the discharge line should be positioned so that it slopes downhill and away from the house. This helps to prevent re-cycling of water, which can lead to overworking the sump pump and causing it to wear out faster than normal.

Contractors will typically install a three or four-inch PVC pipe to the discharge hole on the sump pump. They will also use PVC cement to ensure that the pipe is pointing in the direction of the preferred dumping location. They will then add an air gap to the discharge pipe before it goes underground, which prevents airlocks.

Sump pumps should be tested every few months to make sure they are working properly. This includes checking the float switch and discharge pipe for blockage, leaks, and other issues. It’s also important to test the discharge line outside to make sure that it is extending downhill and away from the house. If it is not, you can add dirt around the foundation or extend the pipe to a new location.

During the test, you should disconnect power from the sump pump and remove the screen at the end of the discharge pipe. You can then rinse off the screen with a hose or wet vacuum to remove any dirt or debris that has built up on it. Once the discharge line is clean, you can reconnect it to the pump and reconnect the power. You should also make sure that the power cord and GFCI outlet are plugged in correctly. You should also wiggle the pipe to ensure that it is tight and hasn’t become loose at a coupling or joint.

Check valve

The check valve is one of the most important parts of a sump pump. It is a one-way valve that prevents water from flowing backward down the discharge pipe. If this did not happen, the sump pump motor would continue to pump out the same water over and over, burning it out.

It is a fairly easy to tell whether the check valve is functioning properly. The check valve is made of clear plastic, so the homeowner can see the action of the gate or flapper. This allows the homeowner to know if the valve is working or not by watching the flow of water down the discharge pipe when the pump shuts off.

Like other valves, the check valve in a sump pump can fail due to age or corrosion. It can also fail if it is located above a high water table or flood zone. If you are using a sump pump in an area of these conditions, it is a good idea to inspect the check valve more often.

In addition to checking for a leak in the body of the valve, you should also inspect the points where the pipes connect to it. In particular, you should check the connection to the discharge pipe for signs of leaking water or sewage. If you suspect that the check valve is leaking, it is a good idea to hire a licensed plumber for inspection and repair.

If you are replacing the check valve, you should first remove all of the water from the discharge pipe. This will make the installation easier and protect your home from flooding. You can use a scrubbing pad, vinegar or a special corrosion cleaner to clean away any pollution that may be clogging the valve. You should also clean off the valve to protect it from future corrosion.

You should then disconnect the new check valve from the discharge pipe. This is usually a quick process, but you should make sure that the new valve is the same length as the old one. You should also carefully check the new valve to ensure that it will fit in your discharge pipe. If the new valve does not fit, it will be necessary to install a larger pipe.

Navigation